
FREQUENCY:
- USES:
50Hz
- 1. Increase to add more fullness to lowest frequency instruments like foot, toms, and the bass.
-2. Reduce to decrease the "boom" of the bass and will increase overtones and the recognition of bass line in the mix. This is most often used on loud bass lines like rock.
100Hz
-1. Increase to add a harder bass sound to lowest frequency instruments.
-2. Increase to add fullness to guitars, snare.
-3. Increase to add warmth to piano and horns.
-4. Reduce to remove boom on guitars & increase clarity.
200Hz
-1. Increase to add fullness to vocals.
-2. Increase to add fullness to snare and guitar ( harder sound ).
-3. Reduce to decrease muddiness of vocals or mid-range instruments.
-4. Reduce to decrease gong sound of cymbals.
400Hz
-1. Increase to add clarity to bass lines especially when speakers are at low volume.
-2. Reduce to decrease "cardboard" sound of lower drums (foot and toms).
-3. Reduce to decrease ambiance on cymbals.
800Hz
-1. Increase for clarity and "punch" of bass.
-2. Reduce to remove "cheap" sound of guitars.
1.5KHz
-1. Increase for "clarity" and "pluck" of bass.
-2. Reduce to remove dullness of guitars.
3KHz
-1. Increase for more "pluck" of bass.
-2. Increase for more attack of electric / acoustic guitar.
-3. Increase for more attack on low piano parts.
-4. Increase for more clarity / hardness on voice.
-5. Reduce to increase breathy, soft sound on background vocals.
-6. Reduce to disguise out-of-tune vocals / guitars.
5KHz
-1. Increase for vocal presence.
-2. Increase low frequency drum attack ( foot / toms).
-3. Increase for more "finger sound" on bass.
-4. Increase attack of piano, acoustic guitar and brightness on guitars.
-5. Reduce to make background parts more distant.
-6. Reduce to soften "thin" guitar.
7KHz
-1. Increase to add attack on low frequency drums ( more metallic sound ).
-2. Increase to add attack to percussion instruments.
-3. Increase on dull singer.
-4. Increase for more "finger sound" on acoustic bass.
-5. Reduce to decrease "s" sound on singers.
-6. Increase to add sharpness to synths, rock guitars, acoustic guitar and piano.
10KHz
-1. Increase to brighten vocals.
-2. Increase for "light brightness" in acoustic guitar and piano.
-3. Increase for hardness on cymbals.
-4. Reduce to decrease "s" sound on singers.
15KHz
- 1. Increase to brighten vocals (breath sound).
-2. Increase to brighten cymbals, string instruments and flutes.
-3. Increase to make sampled synthesizer sound more real.
Welcome to the Blackout Audio Techno Forums :: Underground Network.
 |
 |
 |
 |
Results 1 to 20 of 33
Thread: a few TIPS on EQ issues
-
18-06-2005, 10:11 AM #1BOA Lifetime Member


- Join Date
- Dec 2003
- Location
- Brno /CZ/
- Posts
- 2,111
 a few TIPS on EQ issues
"Computer games don't affect kids, I mean if Pac Man affected us as kids, we'd all run around in a darkened room munching pills and listening to repetitive music."
a few TIPS on EQ issues
"Computer games don't affect kids, I mean if Pac Man affected us as kids, we'd all run around in a darkened room munching pills and listening to repetitive music."
-Kristian Wilson, Nintendo Inc
-
18-06-2005, 10:14 AM #2BOA Lifetime Member
- Join Date
- Dec 2003
- Location
- Brno /CZ/
- Posts
- 2,111
The following excerpt from "The Mixing Engineer's Handbook" by engineer Bobby Owsinski discusses how EQ can affect different frequencies in an audio mix. A Tips and Tricks section at the the end features various professional engineers offering their perspective on EQ techniques.
Before we examine some methods of equalizing, it’s important to note the areas of the audio band and what effect they have on what we hear. The audio band can effectively be broken down into six distinct ranges, each one having enormous impact on the total sound.
• Sub-Bass — The very low bass between 16Hz and 60Hz that encompasses sounds that are often felt more than heard, such as thunder in the distance. These frequencies give the music a sense of power even if they occur infrequently. Too much emphasis on this range makes the music sound muddy.
• Bass — The bass between 60Hz and 250Hz contains the fundamental notes of the rhythm section, so EQing this range can change the musical balance, making it fat or thin. Too much boost in this range can make the music sound boomy.
• Low Mids — The midrange between 250Hz and 2000Hz contains the low order harmonics of most musical instruments and can introduce a telephone-like quality to the music if boosted too much. Boosting the 500Hz to 1000Hz octave makes the instruments sound horn-like, while boosting the 1kHz to 2kHz octave makes them sound tinny. Excess output in this range can cause listening fatigue.
• High Mids — The upper midrange between 2kHz and 4kHz can mask the important speech recognition sounds if boosted, introducing a lisping quality into a voice and making sounds formed with the lips such as “m,” “b” and “v” indistinguishable. Too much boost in this range — especially at 3kHz — can also cause listening fatigue. Dipping the 3kHz range on instrument backgrounds and slightly peaking 3kHz on vocals can make the vocals audible without having to decrease the instrumental level in mixes where the voice would otherwise seem buried.
• Presence — The presence range between 4kHz and 6kHz is responsible for the clarity and definition of voices and instruments. Boosting this range can make the music seem closer to the listener. Reducing the 5kHz content of a mix makes the sound more distant and transparent.
• Brilliance — The 6kHz to 16kHz range controls the brilliance and clarity of sounds. Too much emphasis in this range, however, can produce sibilance on the vocals."Computer games don't affect kids, I mean if Pac Man affected us as kids, we'd all run around in a darkened room munching pills and listening to repetitive music."
-Kristian Wilson, Nintendo Inc
-
18-06-2005, 10:27 AM #3BOA Lifetime Member
- Join Date
- Dec 2003
- Location
- Brno /CZ/
- Posts
- 2,111
Instrument Frequency ranges
To understand EQ and its intricacies you need hands-on experience, but to help you get started, here's a table of general uses and the different ranges that EQ can affect. As every sound is different, though, these are necessarily very general guidelines...
Kick Drum
Any apparent muddiness can be rolled off around 300Hz. Try a small boost around 5-7kHz to add some high end.
Frequency Effect
50-100Hz Adds bottom to the sound
100-250Hz Adds roundness
250-800Hz Muddiness Area
5-8kHz Adds high end prescence
8-12kHz Adds Hiss
Snare
Try a small boost around 60-120Hz if the sound is a little too wimpy. Try boosting around 6kHz for that 'snappy' sound.
Frequency Effect
100-250Hz Fills out the sound
6-8kHz Adds prescence
Hi hats or cymbals
Any apparent muddiness can be rolled off around 300Hz. To add some brightness try a small boost around 3kHz.
Frequency Effect
250-800Hz Muddiness area
1-6kHz Adds presence
6-8kHz Adds clarity
8-12kHz Adds brightness
Bass
Try boosting around 60Hz to add more body. Any apparent muddiness can be rolled off around 300Hz.If more presence is needed, boost around 6kHz. Frequency Effect
50-100Hz Adds bottom end
100-250Hz Adds roundness
250-800Hz Muddiness Area
800-1kHz Adds beef to small speakers
1-6kHz Adds presence
6-8kHz Adds high-end presence
8-12kHz Adds hiss
Vocals
This is a difficult one, as it depends on the mic used to record the vocal. However...
Apply either cut or boost around 300hz, depending on the mic and song.
Apply a very small boost around 6kHz to add some clarity.
Frequency Effect
100-250Hz Adds 'up-frontness'
250-800Hz Muddiness area
1-6kHz Adds presence
6-8kHz Adds sibilance and clarity
8-12kHz Adds brightness
Piano
Any apparent muddiness can be rolled off around 300Hz. Apply a very small boost around 6kHz to add some clarity.
Frequency Effect
50-100Hz Adds bottom
100-250Hz Adds roundness
250-1kHz Muddiness area
1-6kHz Adds presence
6-8Khz Adds clarity
8-12kHz Adds hiss
Electric guitars Again this depends on the mix and the recording. Apply either cut or boost around 300hz, depending on the song and sound. Try boosting around 3kHz to add some edge to the sound, or cut to add some transparency. Try boosting around 6kHz to add presence. Try boosting around 10kHz to add brightness.
Frequency Effect
100-250Hz Adds body
250-800Hz Muddiness area
1-6Khz Cuts through the mix
6-8kHz Adds clarity
8=12kHz Adds hiss
Acoustic guitar
Any apparent muddiness can be rolled off between 100-300Hz. Apply small amounts of cut around 1-3kHz to push the image higher. Apply small amounts of boost around 5kHz to add some presence.
Frequency Effect
100-250Hz Adds body
6-8kHz Adds clarity
8-12kHz Adds brightness
Strings
These depend entirely on the mix and the sound used.
Frequency Effect
50-100Hz Adds bottom end
100-250Hz Adds body
250-800Hz Muddiness area
1-6hHz Sounds crunchy
6-8kHz Adds clarity
8-12kHz Adds brightness
Frequency asked questions...
Low Bass: anything less than 50Hz
This range is often known as the sub bass and is most commonly taken up by the lowest part of the kick drum and bass guitar, although at these frequencies it's almost impossible to determine any pitch. Sub bass is one of the reasons why 12" vinyl became available: low frequencies require wider grooves than high frequencies - without rolling off everything below 50Hz you couldn't fit a full track onto a 7" vinyl record. However we do NOT recommend applying any form of boost around this area without the use of very high quality studio monitors (not home monitors - there is a vast difference between home nearfield and studio farfield monitors costing anywhere between Ł5,000 and Ł20,000). Boosting blindly in this area without a valid reference point can and will permanently damage most speakers, even PA systems. You have been warned!
Bass: 50-250Hz This is the range you're adjusting when applying the bass boost on most home stereos, although most bass signals in modern music tracks lie around the 90-200Hz area with a small boost in the upper ranges to add some presence or clarity.
Muddiness/irritational area: 200-800Hz
The main culprit area for muddy sounding mixes, hence the term 'irritational area'. Most frequencies around here can cause psycho-acoustic problems: if too many sounds in a mix are dominating this area, a track can quickly become annoying, resulting in a rush to finish mixing it as you get bored or irritated by the sound of it.
Mid-range: 800-6kHz
Human hearing is extremely sensitive at these frequencies, and even a minute boost around here will result in a huge change in the sound - almost the same as if you boosted around 10db at any other range. This is because our voices are centred in this area, so it's the frequency range we hear more than any other. Most telephones work at 3kHz, because at this frequency speech is most intelligible. This frequency also covers TV stations, radio, and electric power tools. If you have to apply any boosting in this area, be very cautious, especially on vocals. We're particularly sensitive to how the human voice sounds and its frequency coverage.
High Range: 6-8kHz
This is the range you adjust when applying the treble boost on your home stereo. This area is slightly boosted to make sounds artificially brighter (although this artificial boost is what we now call 'lifelike') when mastering a track before burning it to CD.
Hi-High Range: 8-20kHz
This area is taken up by the higher frequencies of cymbals and hi-hats, but boosting around this range, particularly around 12kHz can make a recording sound more high quality than it actually is, and it's a technique commonly used by the recording industry to fool people into thinking that certain CDs are more hi-fidelity than they'd otherwise sound. However, boosting in this area also requires a lot of care - it can easily pronounce any background hiss, and using too much will result in a mix becoming irritating."Computer games don't affect kids, I mean if Pac Man affected us as kids, we'd all run around in a darkened room munching pills and listening to repetitive music."
-Kristian Wilson, Nintendo Inc
-
18-06-2005, 11:32 AM #4Supreme Freak
- Join Date
- Dec 2004
- Location
- WILTSHIRE
- Posts
- 729
good read bloodstar :clap: . im gonna hav a little study on that lot
-
18-06-2005, 01:13 PM #5BOA Lifetime Member
- Join Date
- Aug 2004
- Location
- Münster, Germany
- Posts
- 2,753
This is a list i have seen quite often as well:
Handy list of eq frequencies.
20 Hz and below - impossible to detect, remove as it only adds unnecessary energy to the total sound, thereby most probably holding down the overall volume of the track
60 Hz and below - sub bass (feel only)
80(-100) Hz - feel AND hear bass
100-120 Hz - the "club sound system punch" resides here
200 Hz and below - bottom
250 Hz - notch filter here can add thump to a kick drum
150-400 Hz - boxiness
200 Hz-1.5 KHz - punch, fatness, impact
800 Hz-4 KHz - edge, clarity, harshness, defines timbre
4500 Hz - exteremly tiring to the ears, add a slight notch here
5-7 KHz - de-essing is done here
4-9 KHz - brightness, presence, definition, sibilance, high frequency distortion
6-15 KHz - air and presence
9-15 KHz - adding will give sparkle, shimmer, bring out details - cutting will smooth out harshness and darken the mix
Here's some more info about Eq's. The "Q" control sets the width of the band of frequencies that will be boosted or reduced!
60Hz with a Q of 1.4 -- Add fullness to kicks.
100Hz with a Q of 1.0 -- Add fullness to snare
200Hz - 250Hz with a Q of 1.4 -- Adds wood to snares
3Khz with a Q of 1.4 -- Adds atack to snare.
5Khz with a Q of 2.8 -- Adds attack to Kicks
7Khz with a Q of 2.8 -- Adds Sharpness to snares and percussion
10Khz with a Q of 1.0 -- Adds brightness to hats and cymbals
-
18-06-2005, 02:58 PM #6BOA Lifetime Member

- Join Date
- Mar 2005
- Location
- Brighton
- Posts
- 2,566
Cheers mate, this is very useful... ;)
-
18-06-2005, 04:00 PM #7BOA Lifetime Member
- Join Date
- Oct 2004
- Location
- LS6 + fuct
- Posts
- 3,008
That has just spurted out of my printer - Gonna have a good read 'cos settling down to a mixdown session soon...
:clap:Pure F*ckin' Noize Terror...
-
18-06-2005, 05:38 PM #8Supreme Freak
- Join Date
- Dec 2004
- Location
- WILTSHIRE
- Posts
- 729
loopdon, so whould you do that with a low cut for the lows. hi cut for the hi's. waves eqs all the rest. i just cant get my head round where ya get the hz readings on the eq's. on my low cuts & hi cuts its easy anoth but its with the channel eq i find it hard. thats with logic eq's i havnt got waves eq yet. i tak its just on the graf on eq
-
18-06-2005, 06:15 PM #9BOA Lifetime Member
- Join Date
- Aug 2004
- Location
- Münster, Germany
- Posts
- 2,753
nova, unfortunately i don'z know much about logic, but i googled this up

you should be able to change the 'hz' settings in this eq, should be your version of logic, too? i suppose you can either doubleclick the values to enter values, or do it with the mouse in the eq itself. prolly both.
in waves it would like this, very easy to use.

-
18-06-2005, 07:28 PM #10Supreme Freak
- Join Date
- Dec 2004
- Location
- WILTSHIRE
- Posts
- 729
cheers ld. yeah thats the logic 1. on the waves 1 you can see the frequeces going down. which i take you get the reading from. but on the logic 1 they dont seem to change when pulling the the lines round on the graf. mad i didnt kno the logic eq had an analyzer. can see how theyve cut and boost. heavy stuff dude ;)
-
19-06-2005, 04:19 AM #11Junior Freak
- Join Date
- Jun 2003
- Posts
- 176
I still reckon you should just sample whatever you're interested in and switch to spectral view in Adobe Audition and look at where your bass, kick etc. are actually hitting the frequencies, instead of just guessing from tables like the one in this thread. Sort of like the difference between having someone give you a description of where an object in a darkened room is probably going to be, versus turning on the light and actually seeing for yourself.
Realtime spectral analysers are little good either, IMO; it's just too much information jumping around in front of your eyes to make any sense of.
-
19-06-2005, 01:25 PM #12BOA Lifetime Member
- Join Date
- Dec 2003
- Location
- Brno /CZ/
- Posts
- 2,111
yep. deffinitely true, that it's better to check on Spectrum analyzer.. but i still think that the table above can be very useful when u know approx.. where the problematic frequencies are..
"Computer games don't affect kids, I mean if Pac Man affected us as kids, we'd all run around in a darkened room munching pills and listening to repetitive music."
-Kristian Wilson, Nintendo Inc
-
19-06-2005, 03:05 PM #13Junior Freak
- Join Date
- Dec 2004
- Location
- Belgium
- Posts
- 276
Thanks mate, really helpfull stuff
-
20-06-2005, 02:50 PM #14Supreme Freak
- Join Date
- Dec 2004
- Location
- WILTSHIRE
- Posts
- 729
yeah guys good stuff. my m8 has got that adobe so i might just beable to hav a go a that. im on mac at mo so no adobe for me.
-
20-06-2005, 03:00 PM #15BOA Lifetime Member
- Join Date
- Dec 2003
- Location
- Brno /CZ/
- Posts
- 2,111
Voxengo SPAN is very nice spectrum analyzer.and it's FREE. i'm not sure if it's for MAC, looks like it's just for PC.
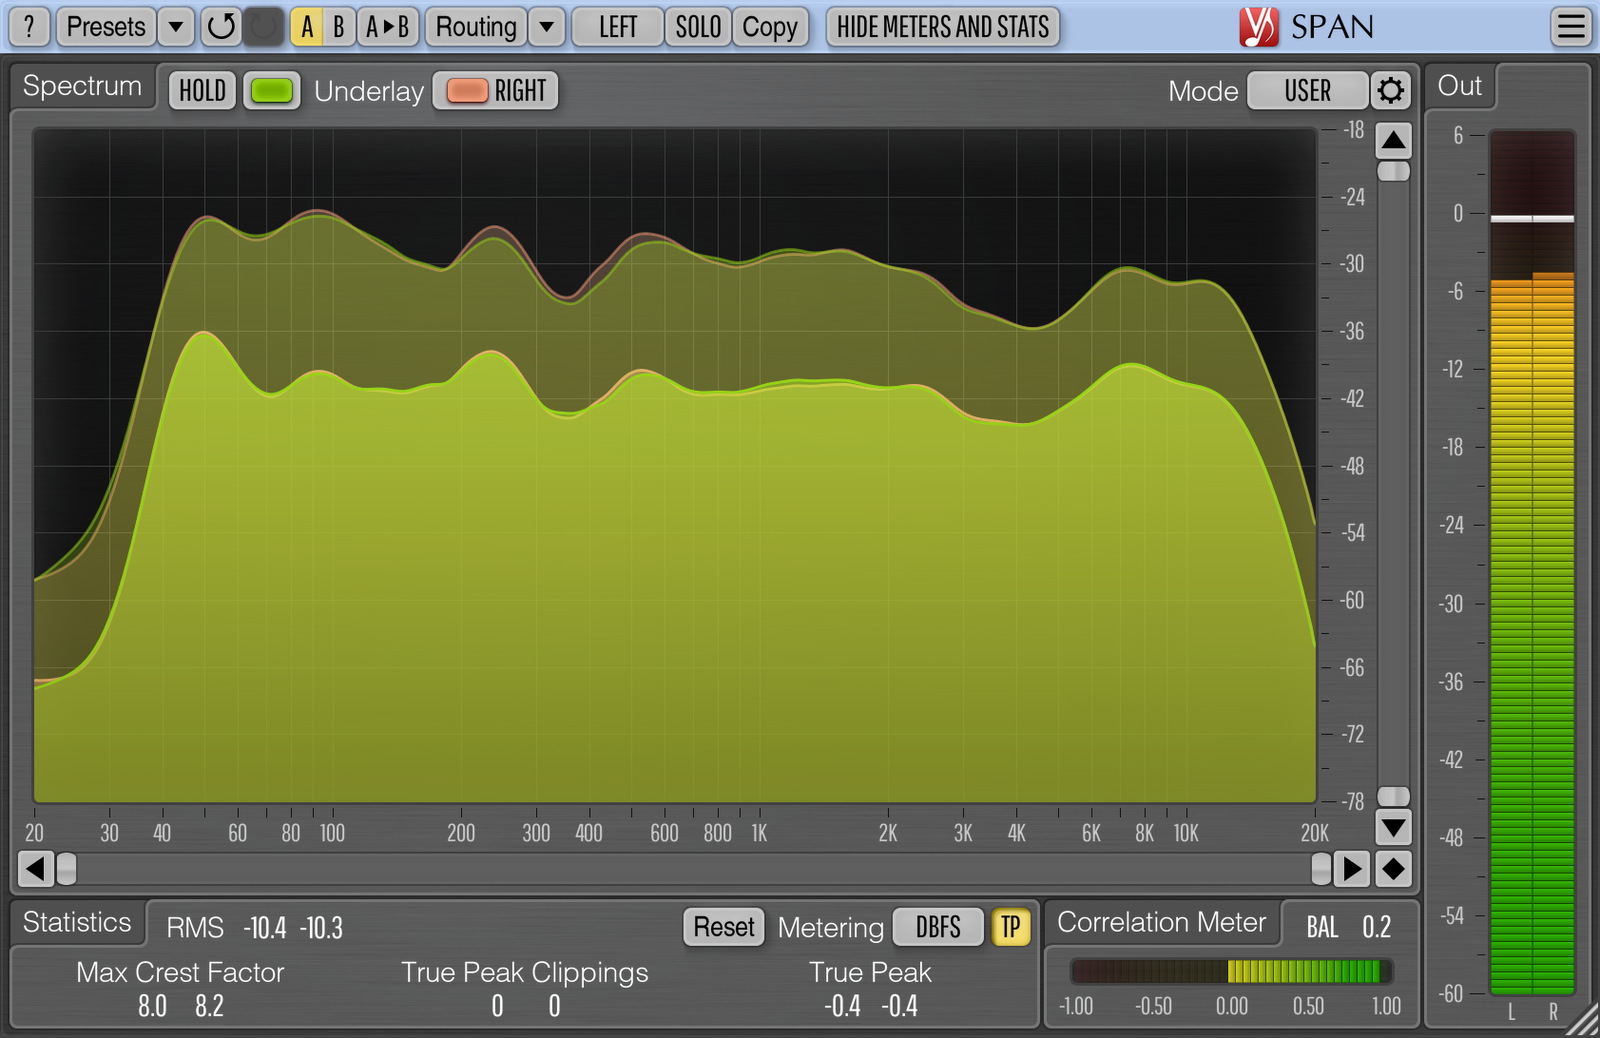
more here>>>
http://www.voxengo.com/product/SPAN/"Computer games don't affect kids, I mean if Pac Man affected us as kids, we'd all run around in a darkened room munching pills and listening to repetitive music."
-Kristian Wilson, Nintendo Inc
-
20-06-2005, 03:28 PM #16Supreme Freak
- Join Date
- Dec 2004
- Location
- WILTSHIRE
- Posts
- 729
looks good. so onset youve analyze'd the sound it will giv you a reading of where the sound sit's. then depending on wot sound you are using and where ya want it to be you whould trim off freq's & add?? ;)
im basic's guys . i realy need ta see it all done in front of my eye's. on my setup for it ta realy sink in. pages of these topics are defo good ta save & hav alook when doing a tune. or a dvd is there any dvds that cover mastering dance?? i think that might sink it in abit
-
20-06-2005, 04:41 PM #17BOA Lifetime Member
- Join Date
- Dec 2003
- Location
- Brno /CZ/
- Posts
- 2,111
i'd advice to EQ by ears, and then check it on analyzer .i always give one SPAN on master bus,,, then solo a sound i want to see the freq curve,and then cut,or whatever..
i obviously just cut and not boost,,,but i can be wrong in this."Computer games don't affect kids, I mean if Pac Man affected us as kids, we'd all run around in a darkened room munching pills and listening to repetitive music."
-Kristian Wilson, Nintendo Inc
-
21-06-2005, 02:11 AM #18Junior Freak
- Join Date
- Jun 2003
- Posts
- 176
Yup, though you'll have to home in on the area of interest by zooming in order to see or do anything meaningful. You can select a specific frequency over a specific range of time using the marquee tool and then boost or fade it with effects (i.e. "Amplify/Fade"), although because you could apply any effect, that's just the tip of the iceberg.looks good. so onset youve analyze'd the sound it will giv you a reading of where the sound sit's. then depending on wot sound you are using and where ya want it to be you whould trim off freq's & add??
-
21-06-2005, 12:45 PM #19Supreme Freak
- Join Date
- Dec 2004
- Location
- WILTSHIRE
- Posts
- 729
Yup, though you'll have to home in on the area of interest by zooming in order to see or do anything meaningful. You can select a specific frequency over a specific range of time using the marquee tool and then boost or fade it with effects (i.e. "Amplify/Fade"), although because you could apply any effect, that's just the tip of the iceberg.[/quote]
right so when an channel eq is first opened its flat right. after analyzing the sound that will show where abouts the sound is. then you know where abouts to bring the eq up yeah? to fit the orginal sound in the eq & anything over or under would be cutting or boosting
-
22-06-2005, 12:20 AM #20Junior Freak
- Join Date
- Jun 2003
- Posts
- 176
Not sure if we're quite on the same page here, as what I'm referring to doesn't use Audition's EQs at all. To check, what I'm referring to is:right so when an channel eq is first opened its flat right. after analyzing the sound that will show where abouts the sound is. then you know where abouts to bring the eq up yeah? to fit the orginal sound in the eq & anything over or under would be cutting or boosting
1) Open a waveform in the waveform editor.
2) Find the icon called "Spectral Display" in the toolbar and click on it. There should be a pause and timebar as Audition redraws the sound as a spectrum.
3) With spectrum visible, move mouse over horizontal ruler on the left which is displaying frequencies in hz. Spin your mouse wheel to zoom, and grab and drag to move up or down (and you'll probably want to mousewheel zoom on the timeline at the top and drag that left and right too). Most easy place to get started is at low (100s) hz, where depending on what you're looking at you should be able to see kicks and bass (and undefined really low frequency stuff which you may want to roll off).
4) Once you've seen something you want to boost or fade, select the marquee tool from the toolbar, and then draw a box around the blob of colour that you want to fade or amplify (or just hit delete, although that'll leave an audible hole in your sound I find...an Amplify/Fade of -35 db will do the same trick and not be audible).
5) Click on the effects tab and doubleclick "Amplify/Fade". Usually you'll be cutting, so set it to say -9 db and hit OK. After processing Audition will rebuild the spectral display with that blob dimmer.
You can remove stuff very surgically offline in this way (e.g. get rid of snares and kick and just leave the high hats from a breakbeat) in a way that a realtime EQ effect can't, because a realtime EQ will attenuate without regard for time (and therefore chop out bits of high hat that share some hz with the snare you're trying to kill off). On the other hand, it also lets you see precisely where a realtime EQ needs to work in order to affect a certain sound, which is a lot easier to see than with a realtime spectral analyser (where you've got this leaping line in front of your eyes, which can be difficult to draw meaningful information from if there's a lot of harmonics jumping around). <-IMO

 Reply With Quote